On this page
Make videos accessible and easy to follow using engaging captions. Video captions can increase a video's reach, help viewers follow content on mute, and overcome language barriers.
The autocaptions feature in Clipchamp generates accurate subtitles for free in a range of languages. The AI-powered voice detection technology converts audio to text in a few clicks, safely and privately.
Learn how to generate autocaptions and transcribe any video with no typing required in Clipchamp video editor.
How to use autocaptions
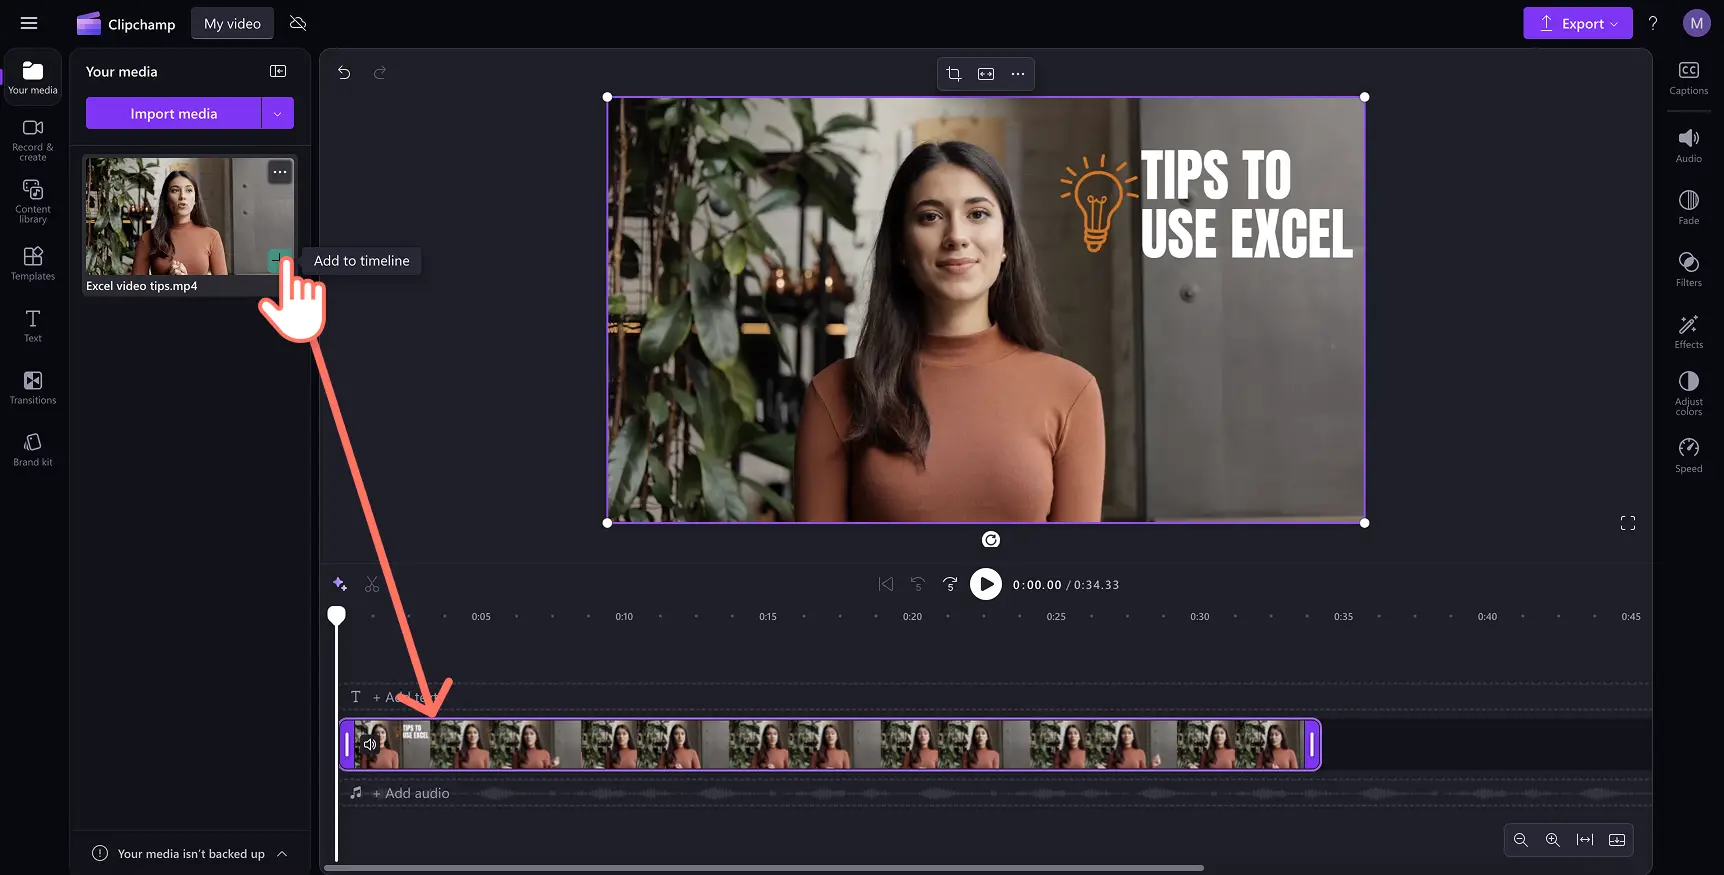
Step 1. Import and add your video to the timeline
To import your own videos, photos, and audio, click on the import media button in the your media tab on the toolbar to browse your computer files, or connect your OneDrive. You can also record a video directly in the editor using our webcam recorder in the record & create tab on the toolbar.
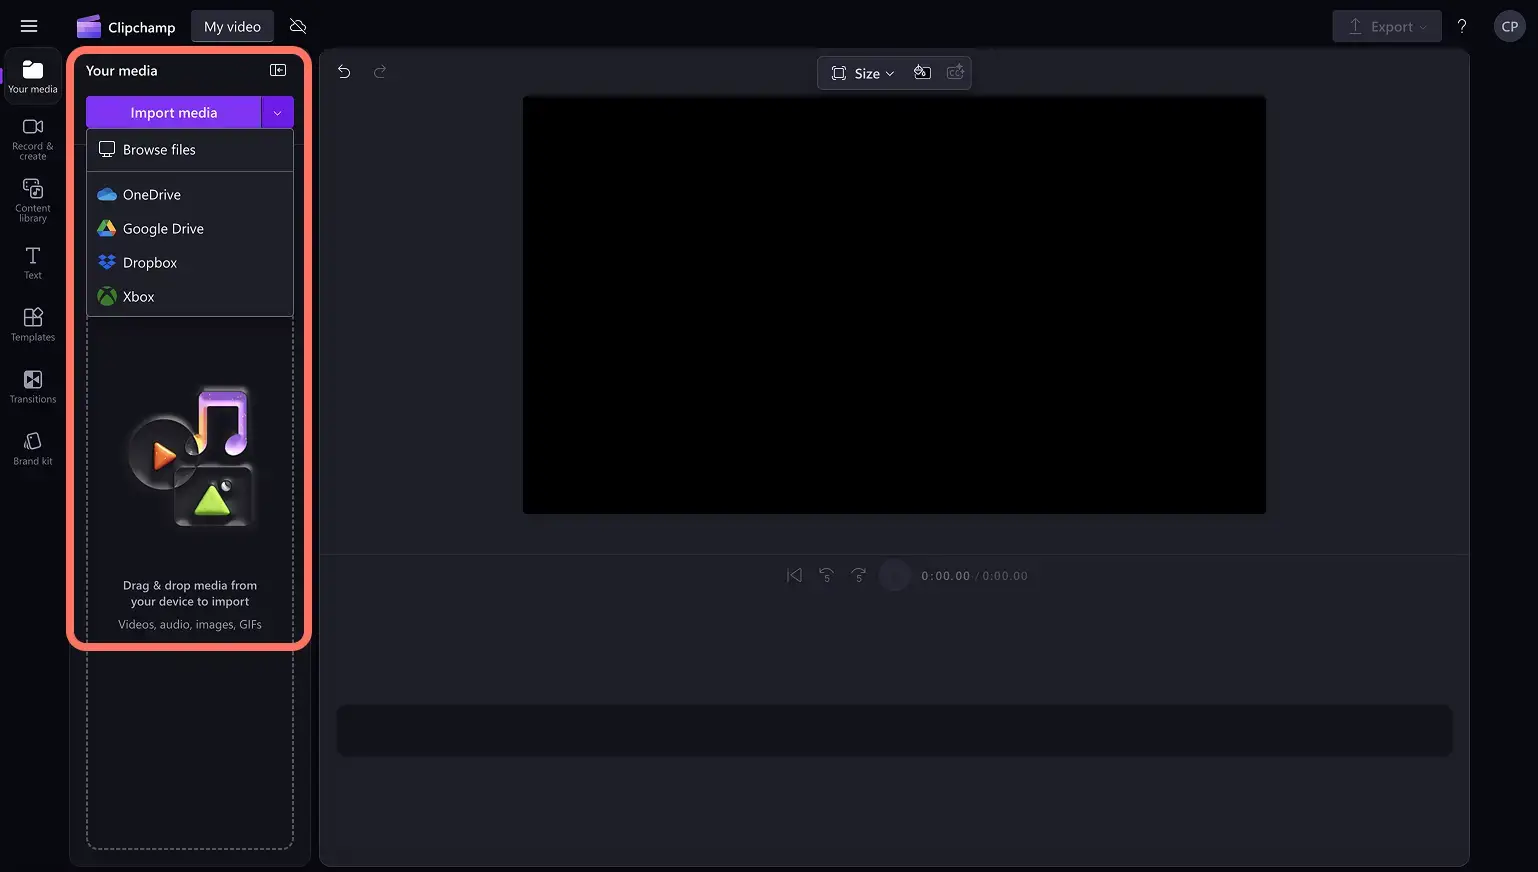
Next, drag and drop your video onto the timeline.
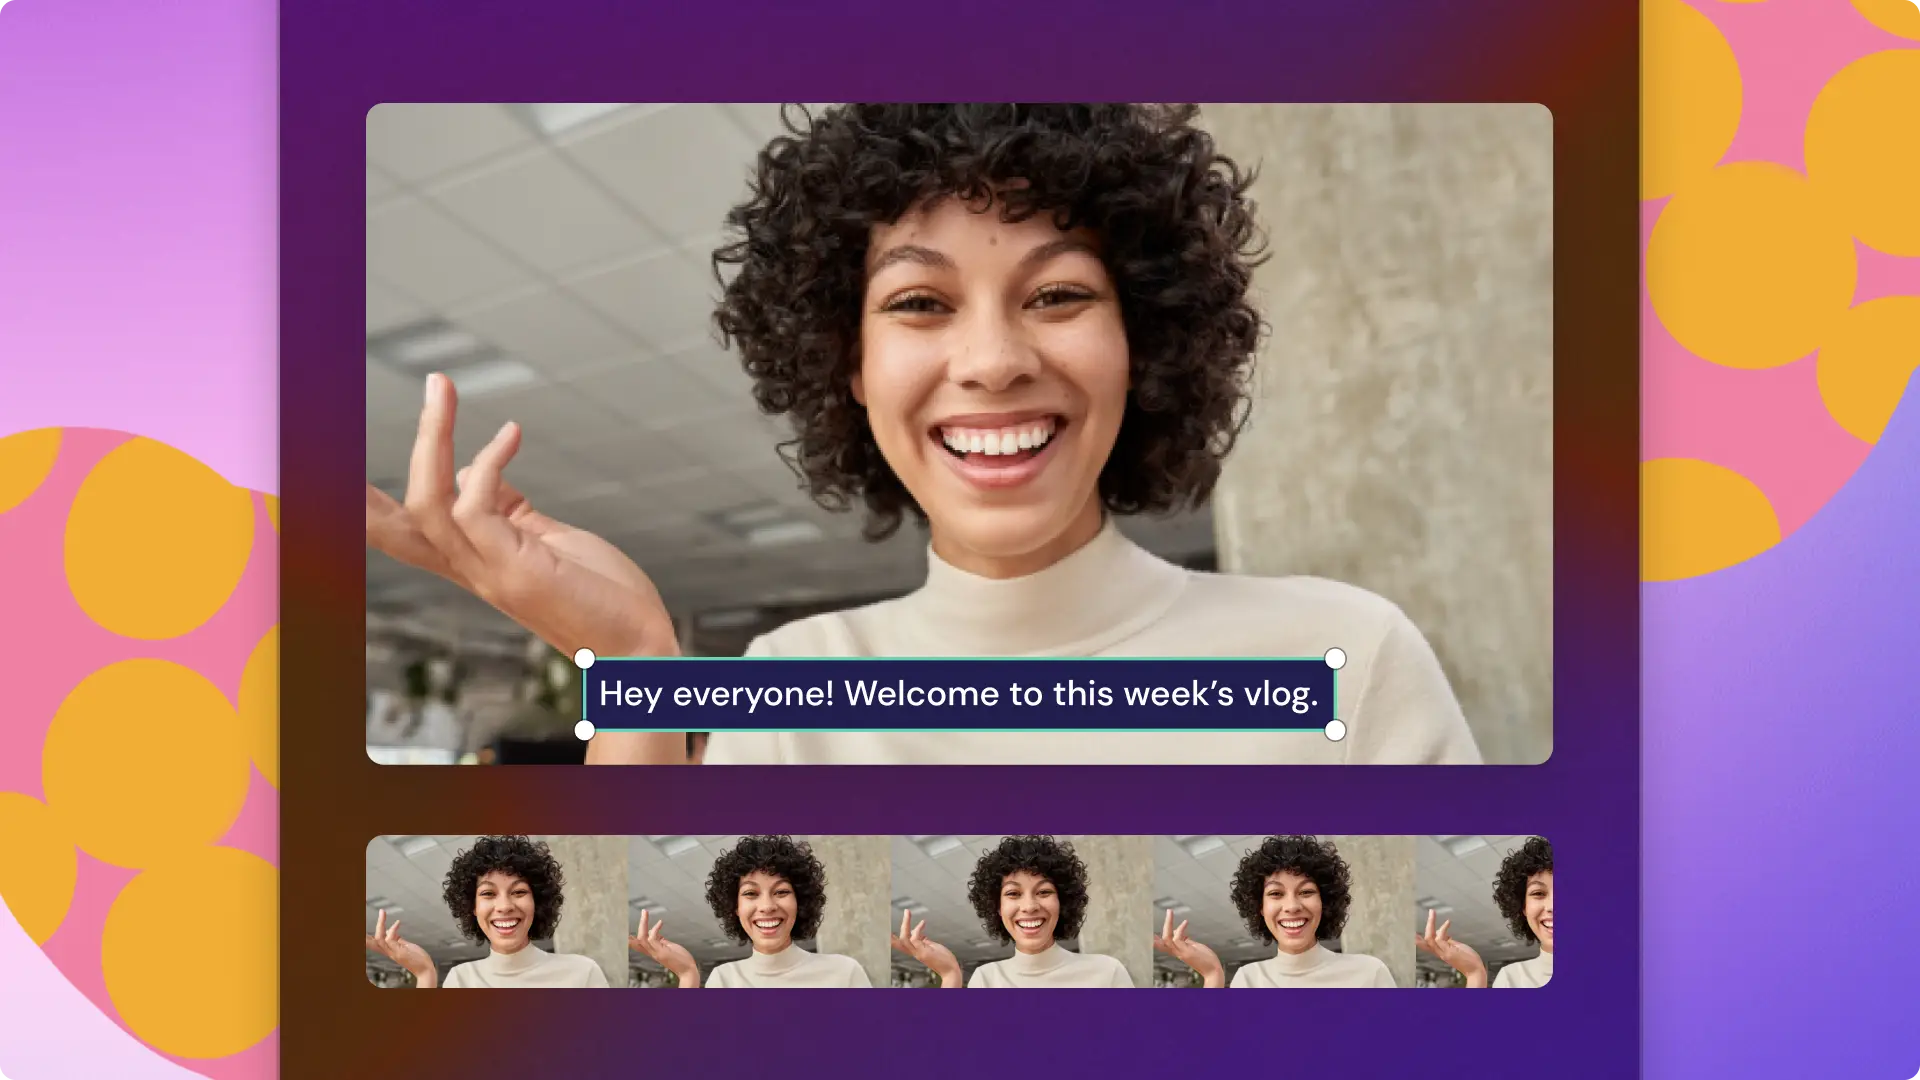
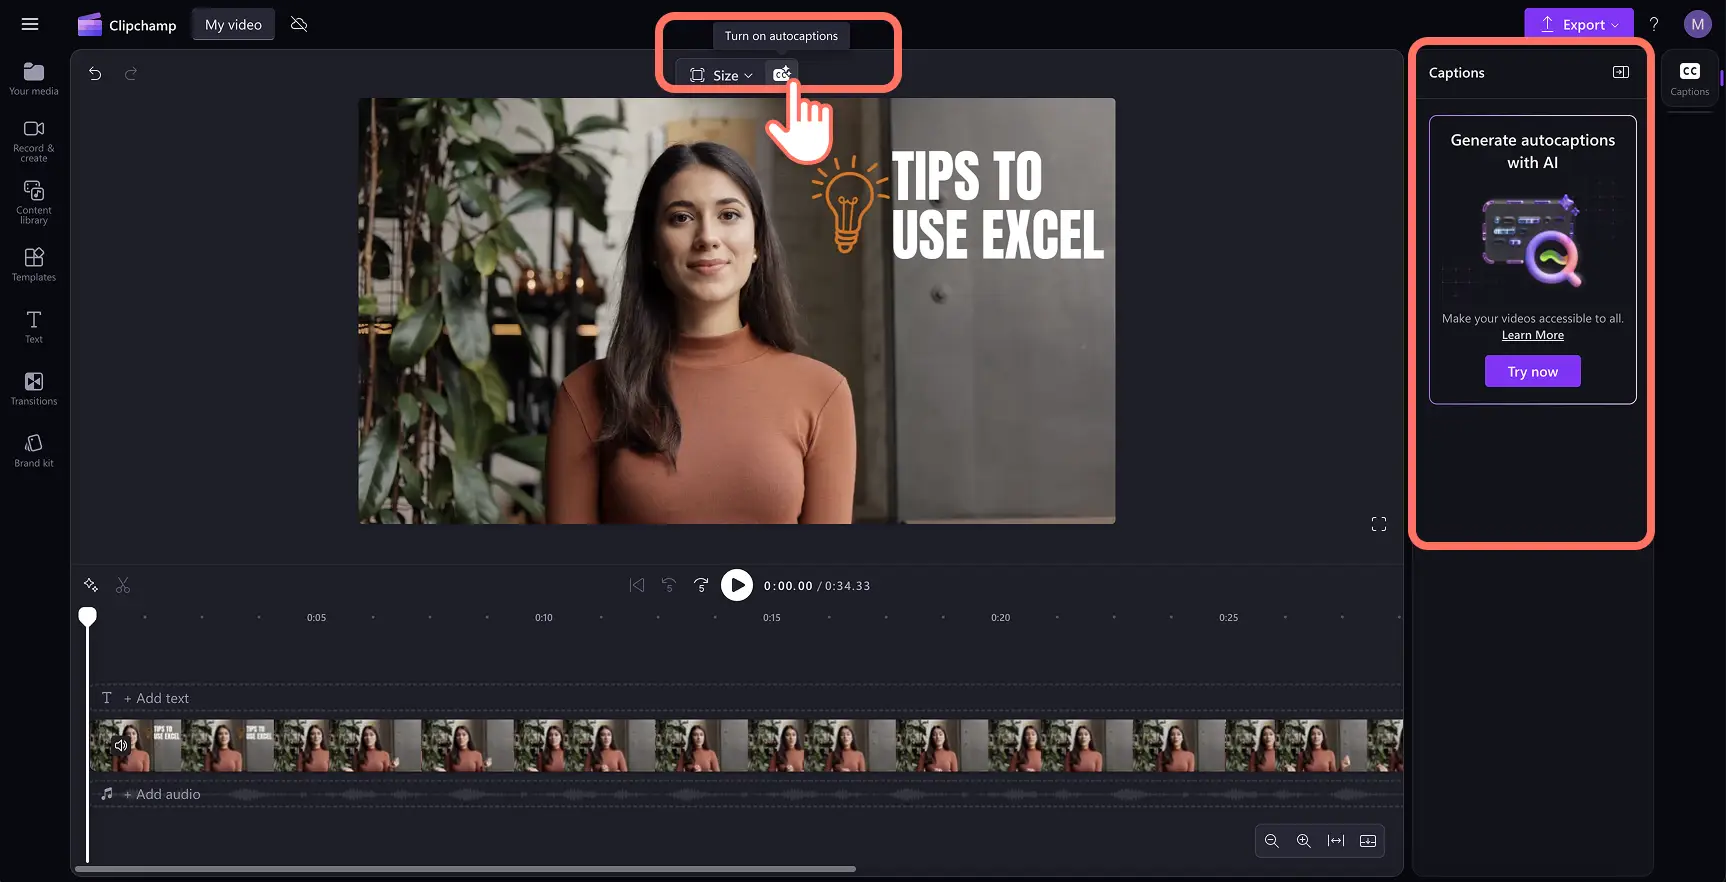
Step 2. Add captions to your video
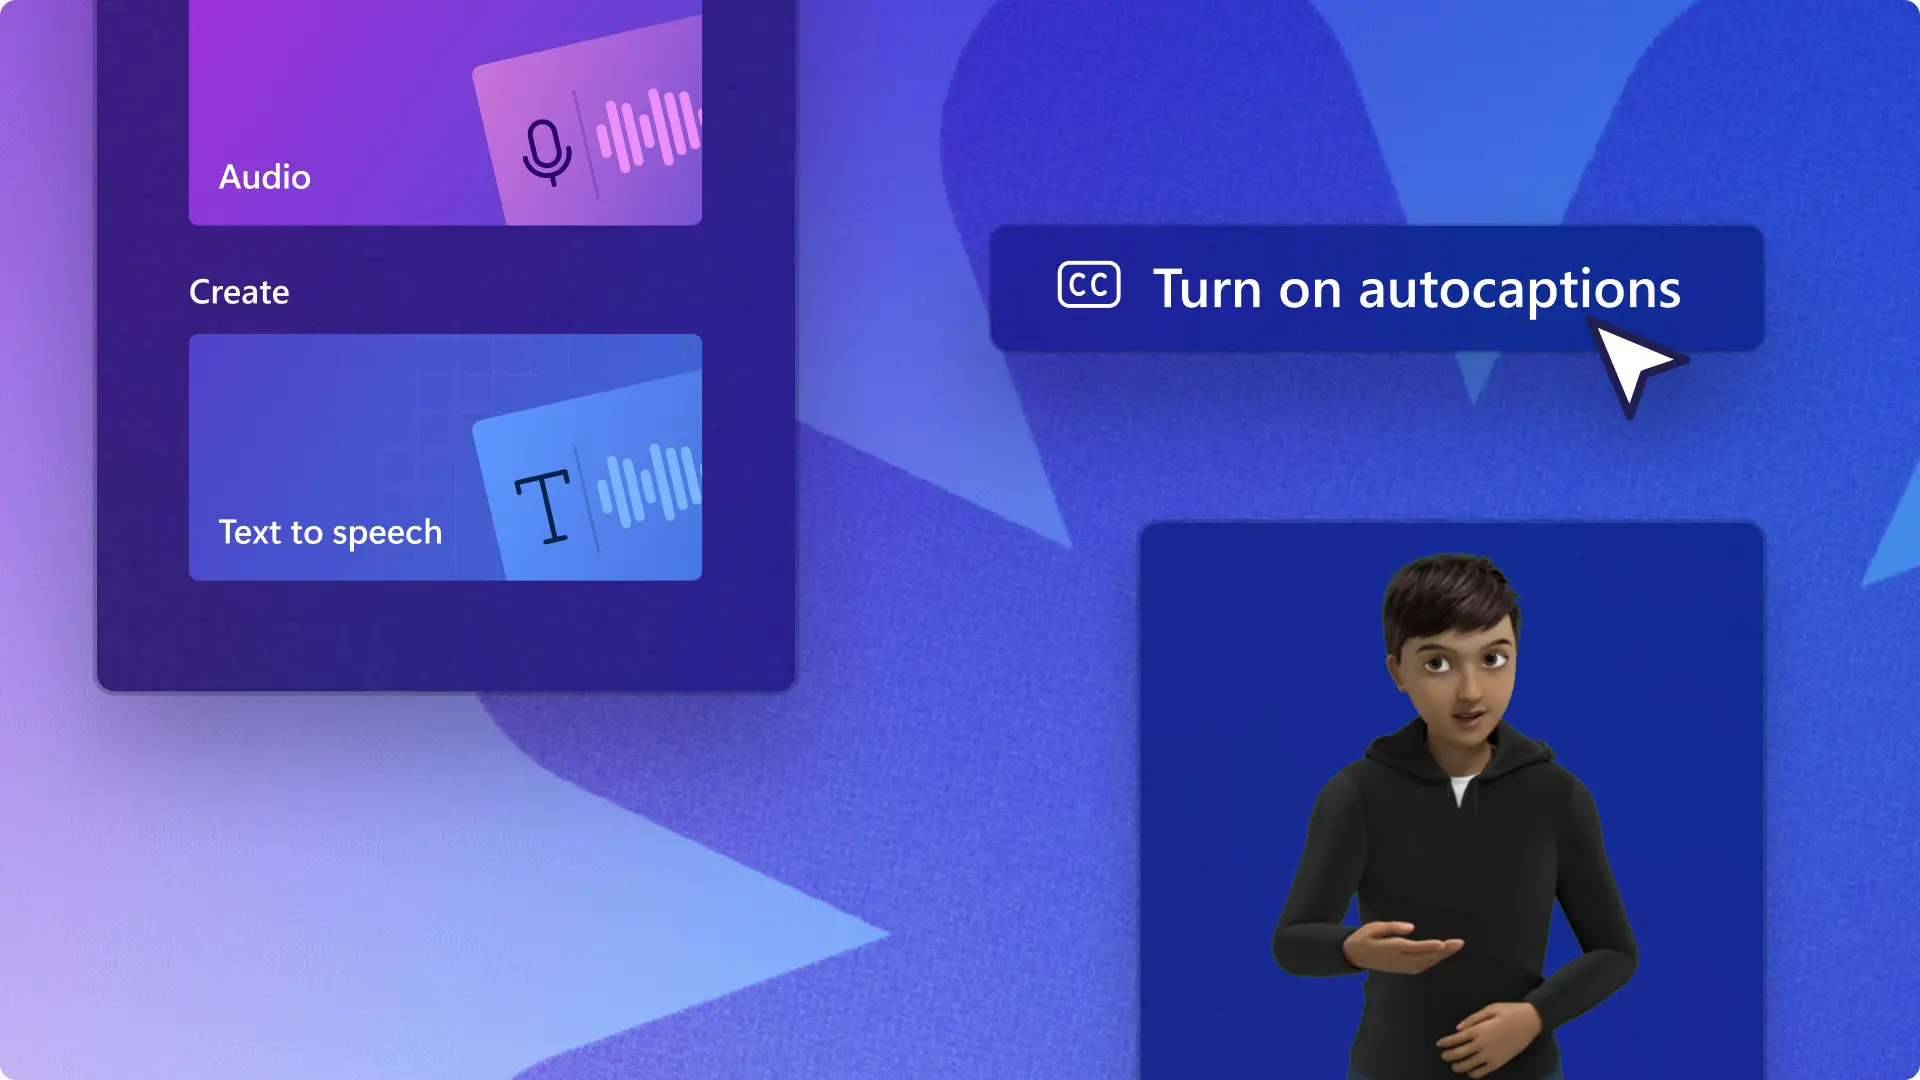
Click on the captions icon in the video preview to turn on autocaptions. Alternatively, click on the captions tab on the property panel to turn on autocaptions.
Note: the autocaptions feature is compatible with videos and audio files that include voice. Any audio that doesn't include voice will not be eligible for captions.
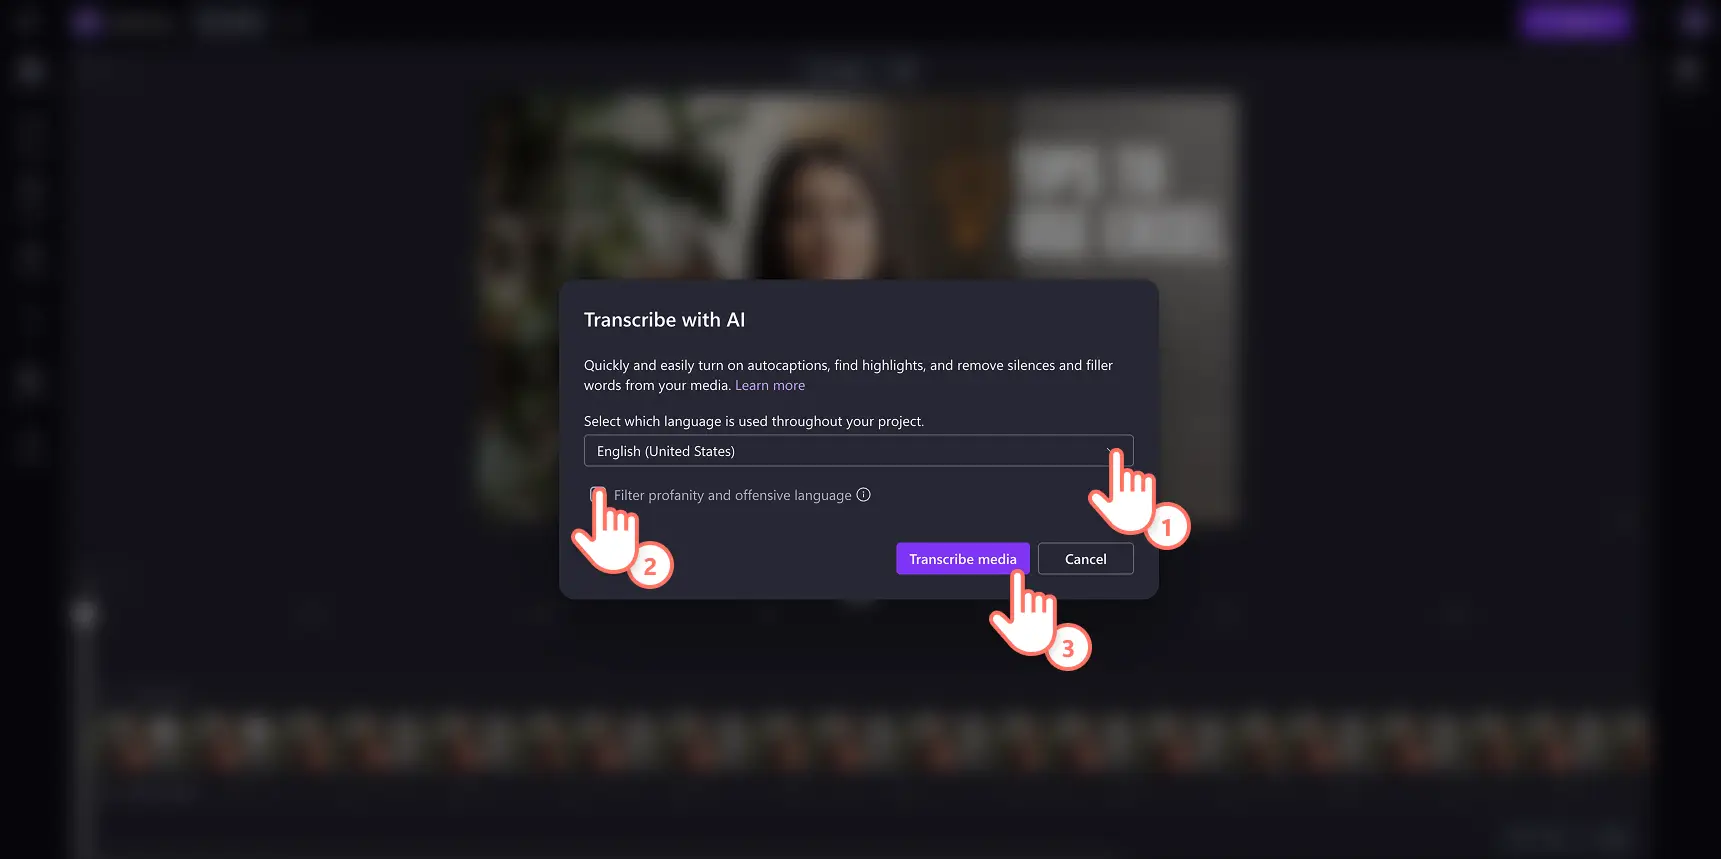
A pop-up window will appear with transcription options. Select the language you would like to use throughout your video, and check the box to filter any profanity and offensive language using AI. When you're ready to continue, click on the transcribe media button. Click on the cancel button if you wish to exit the pop-up window.
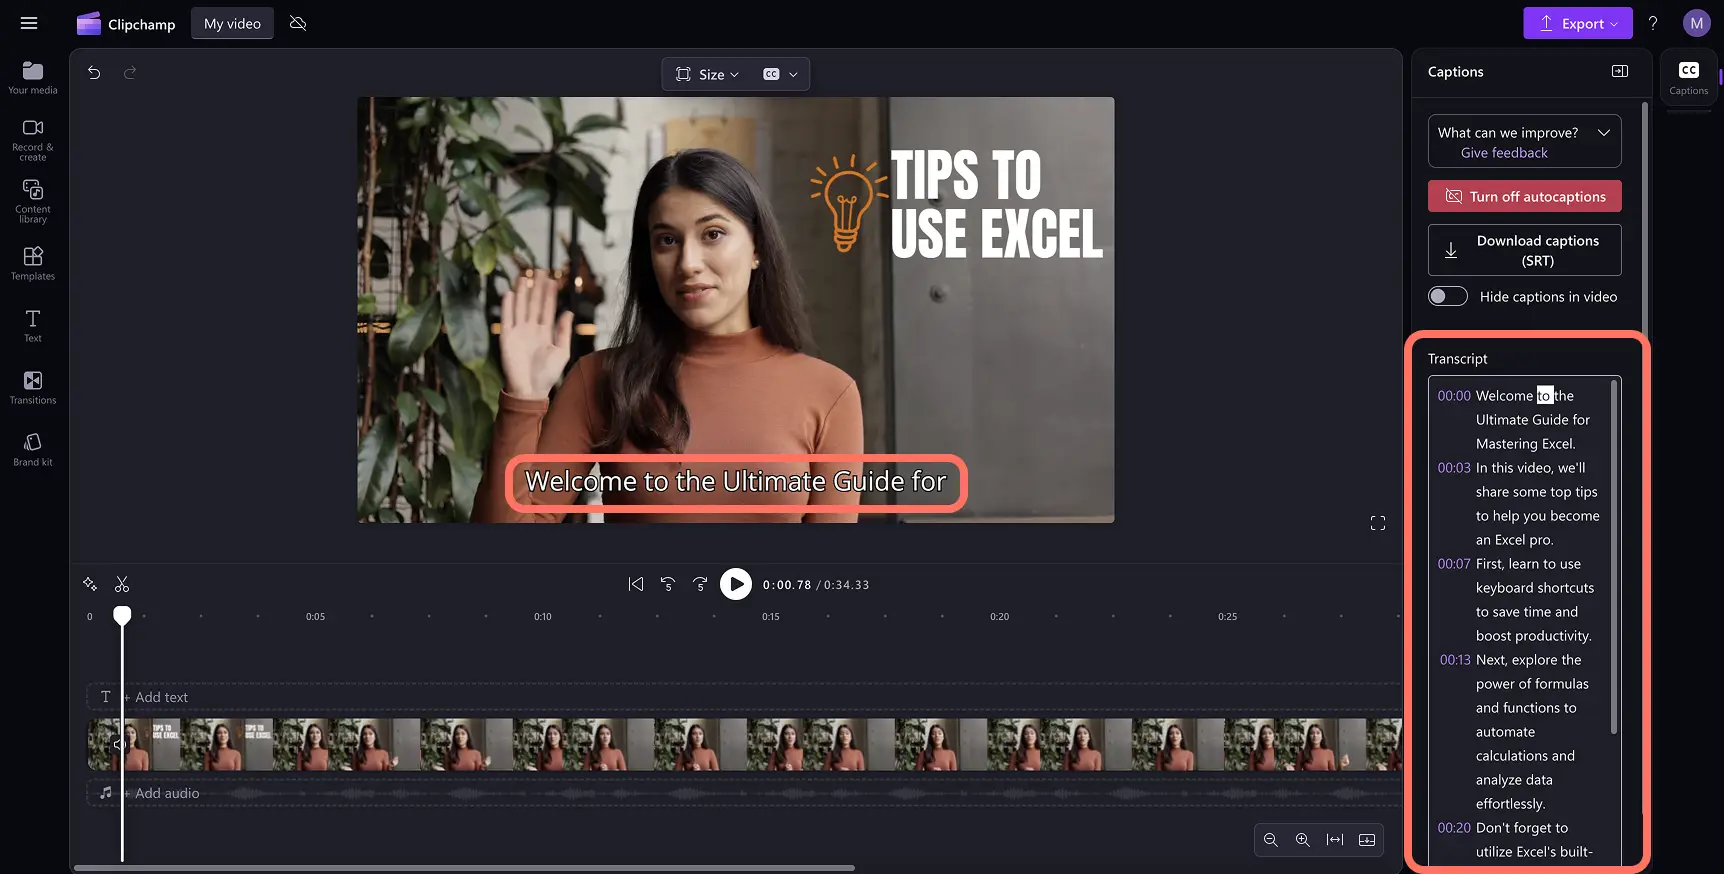
The subtitle text will start generating in the captions tab on the property panel and appear on the video preview window.
Note: the subtitle generation time depends on your internet connection, speed, and the length of your video.
Step 3. Preview captions and save your video
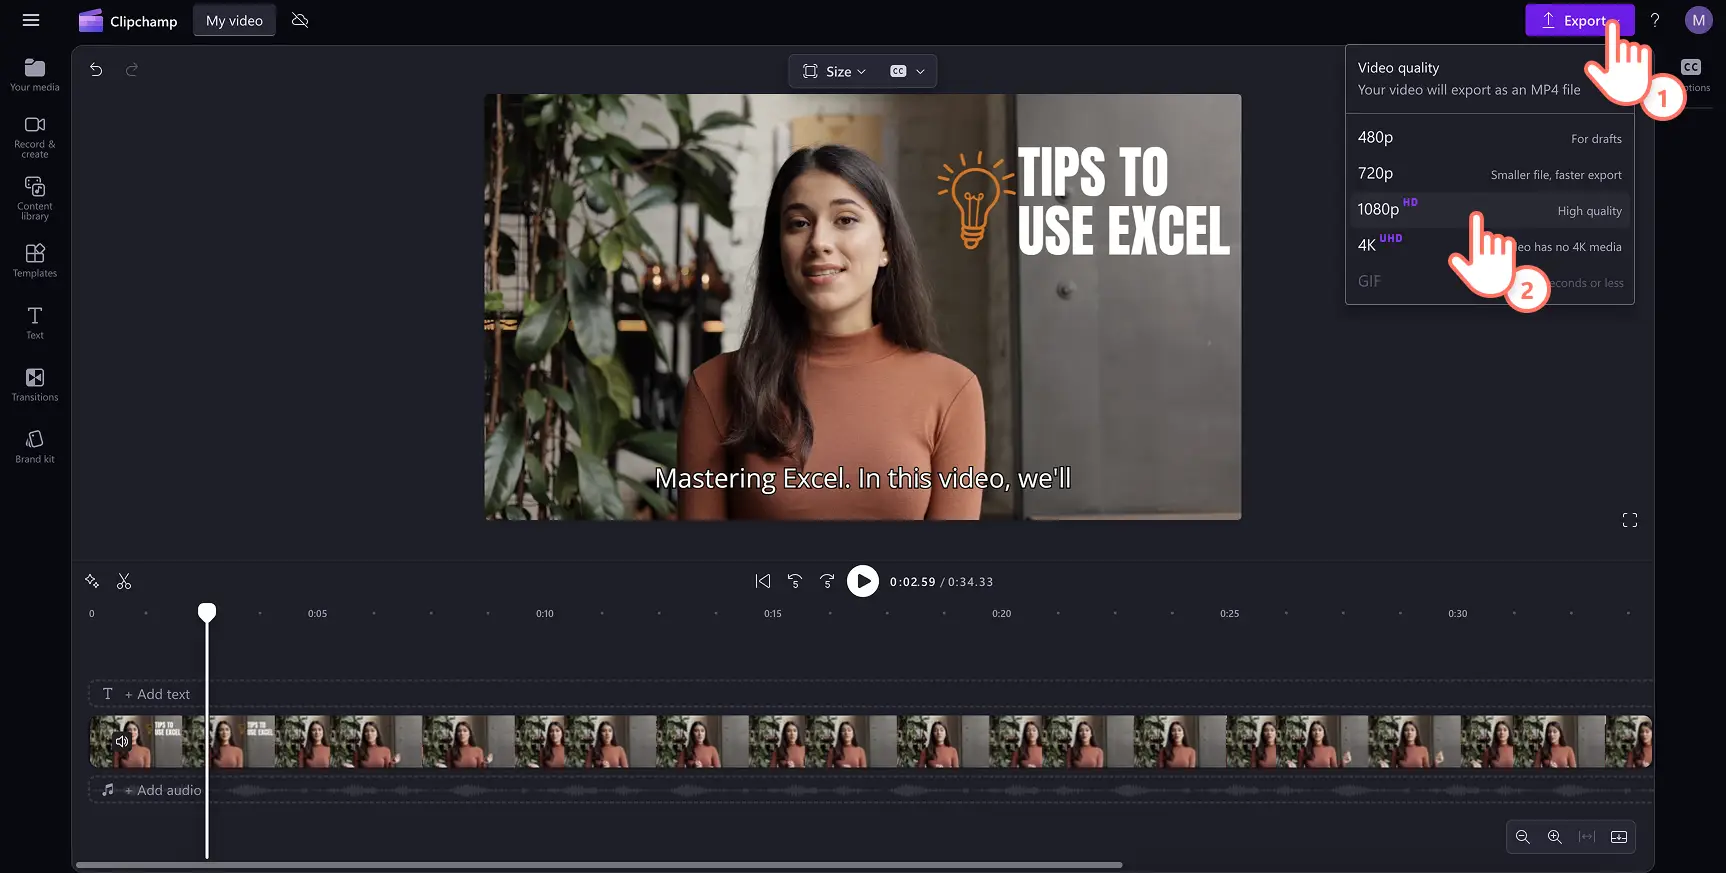
Click on the play button to preview how the captions look. When it's ready to save, click on the export button and select a video resolution.
How to edit and customize subtitles
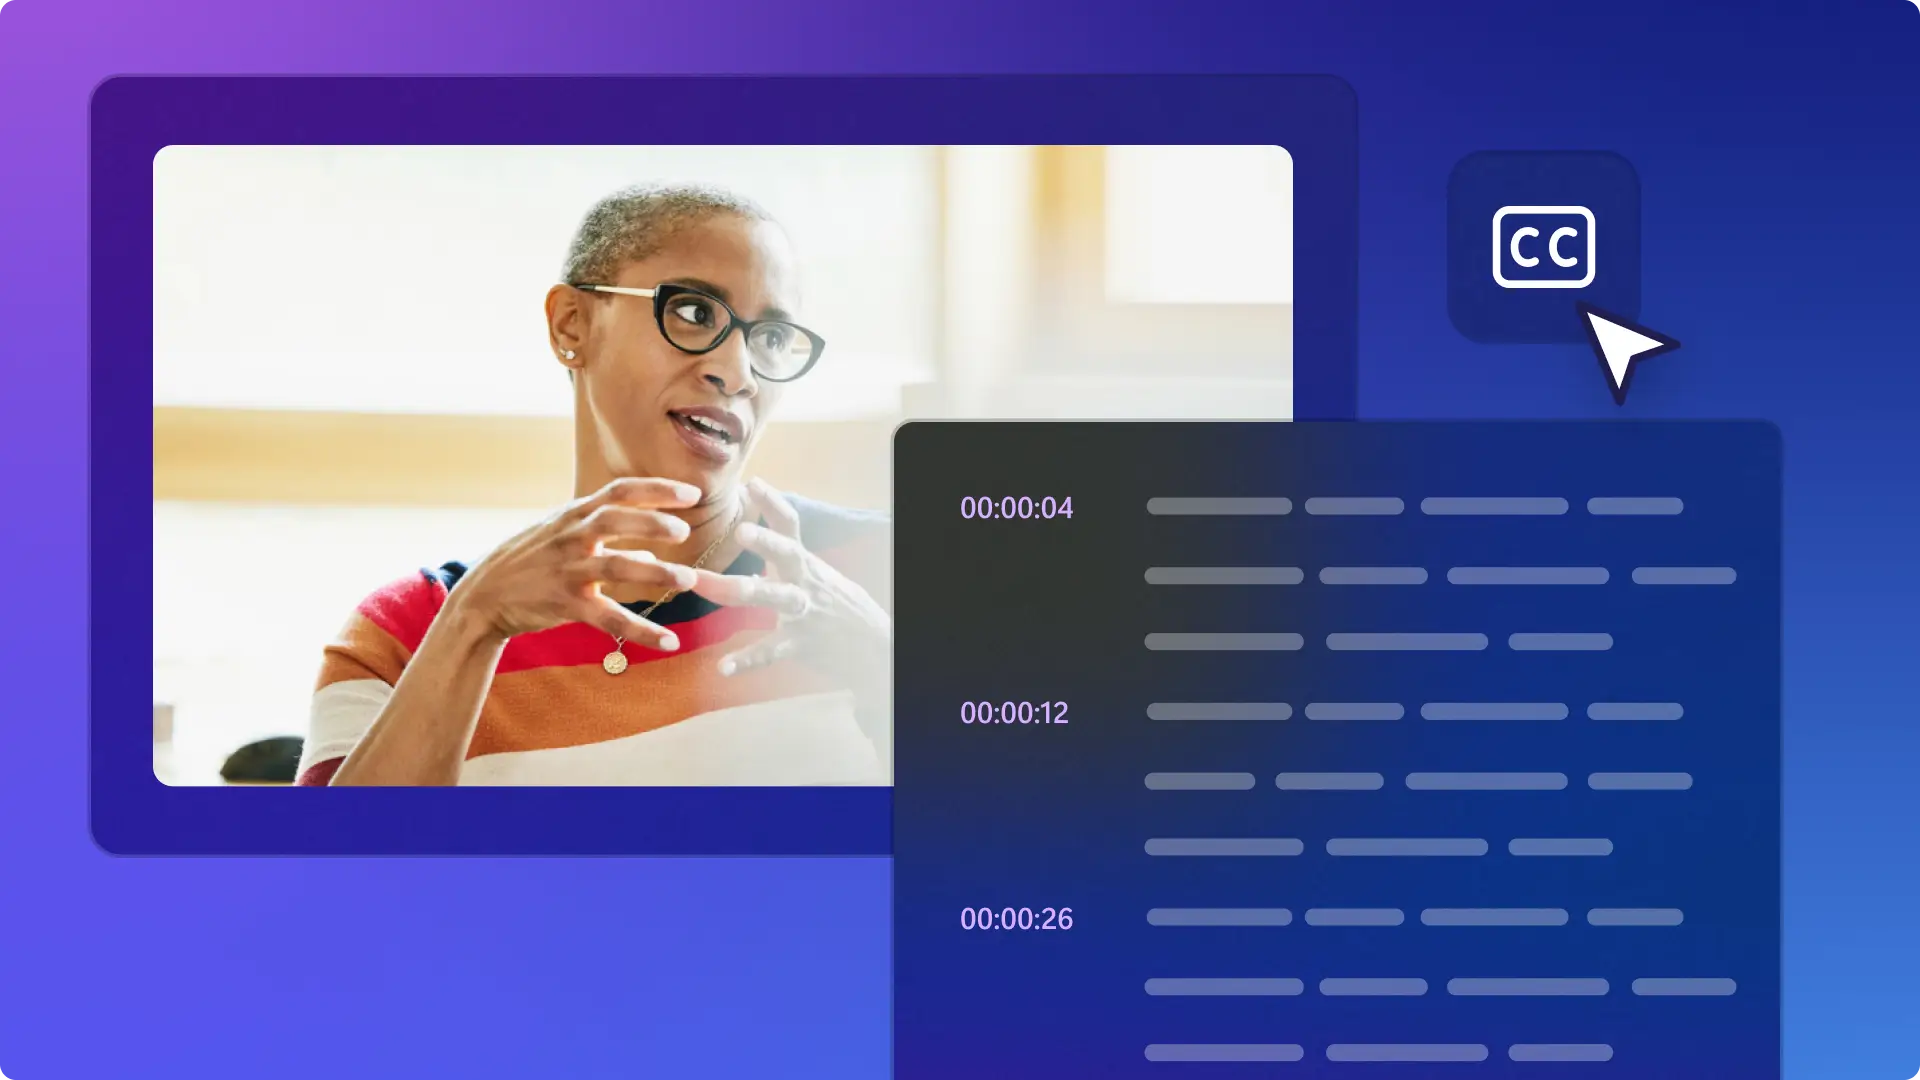
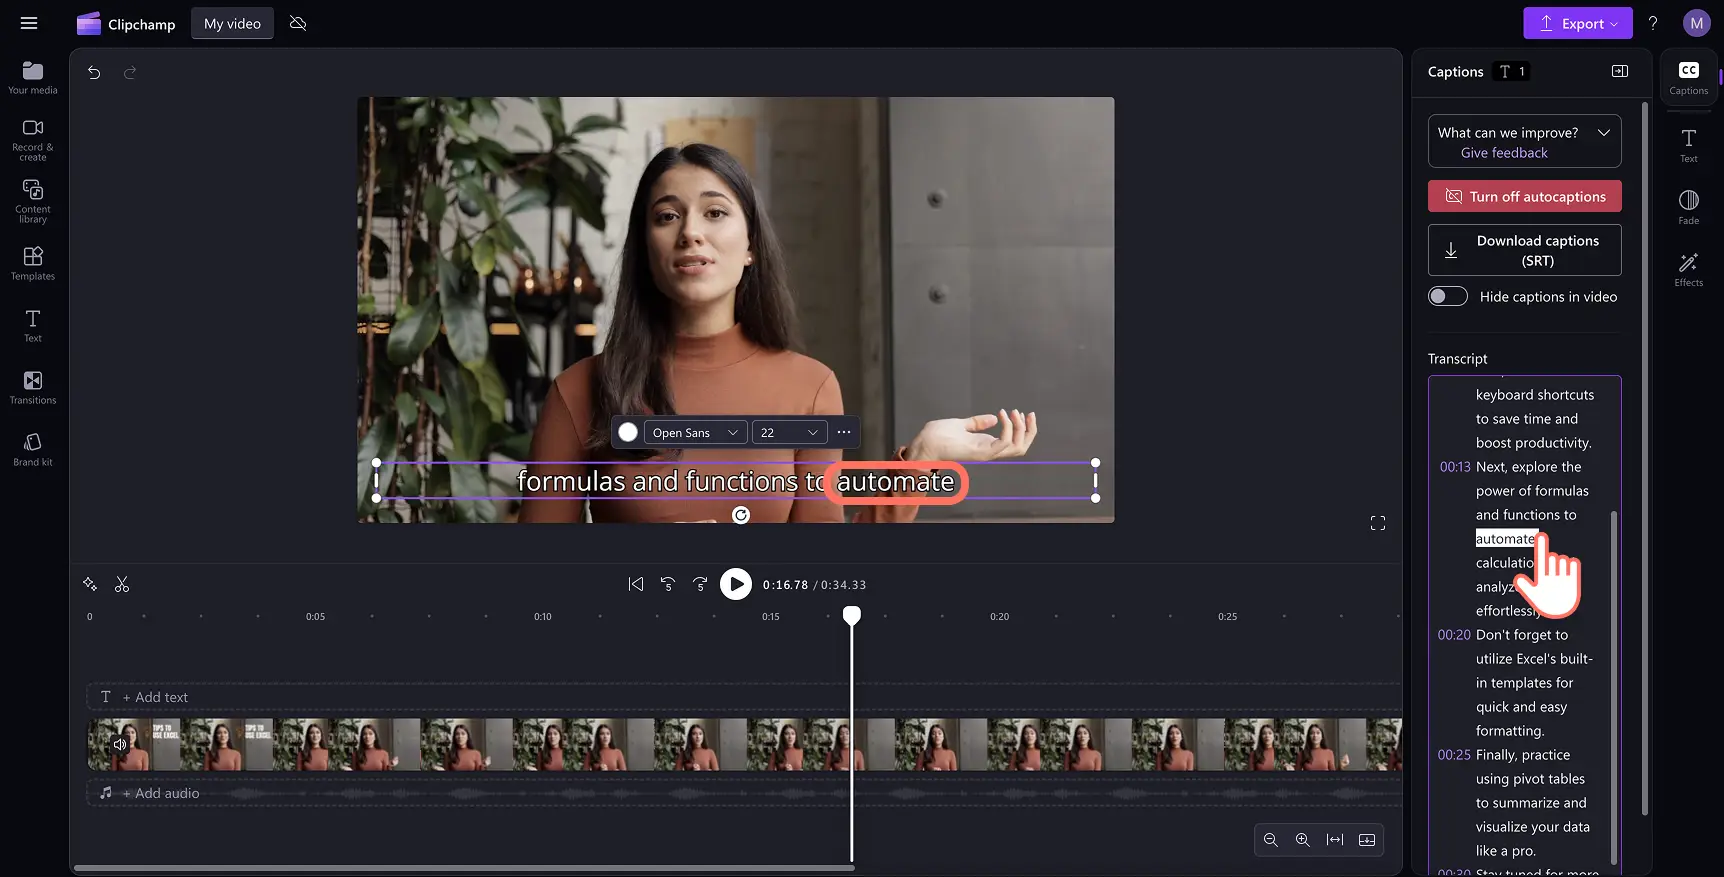
Edit the video transcript
Open the transcript in the property panel.
Double-click to select the specific word that is misspelled.
Rewrite the spelling or delete the word.
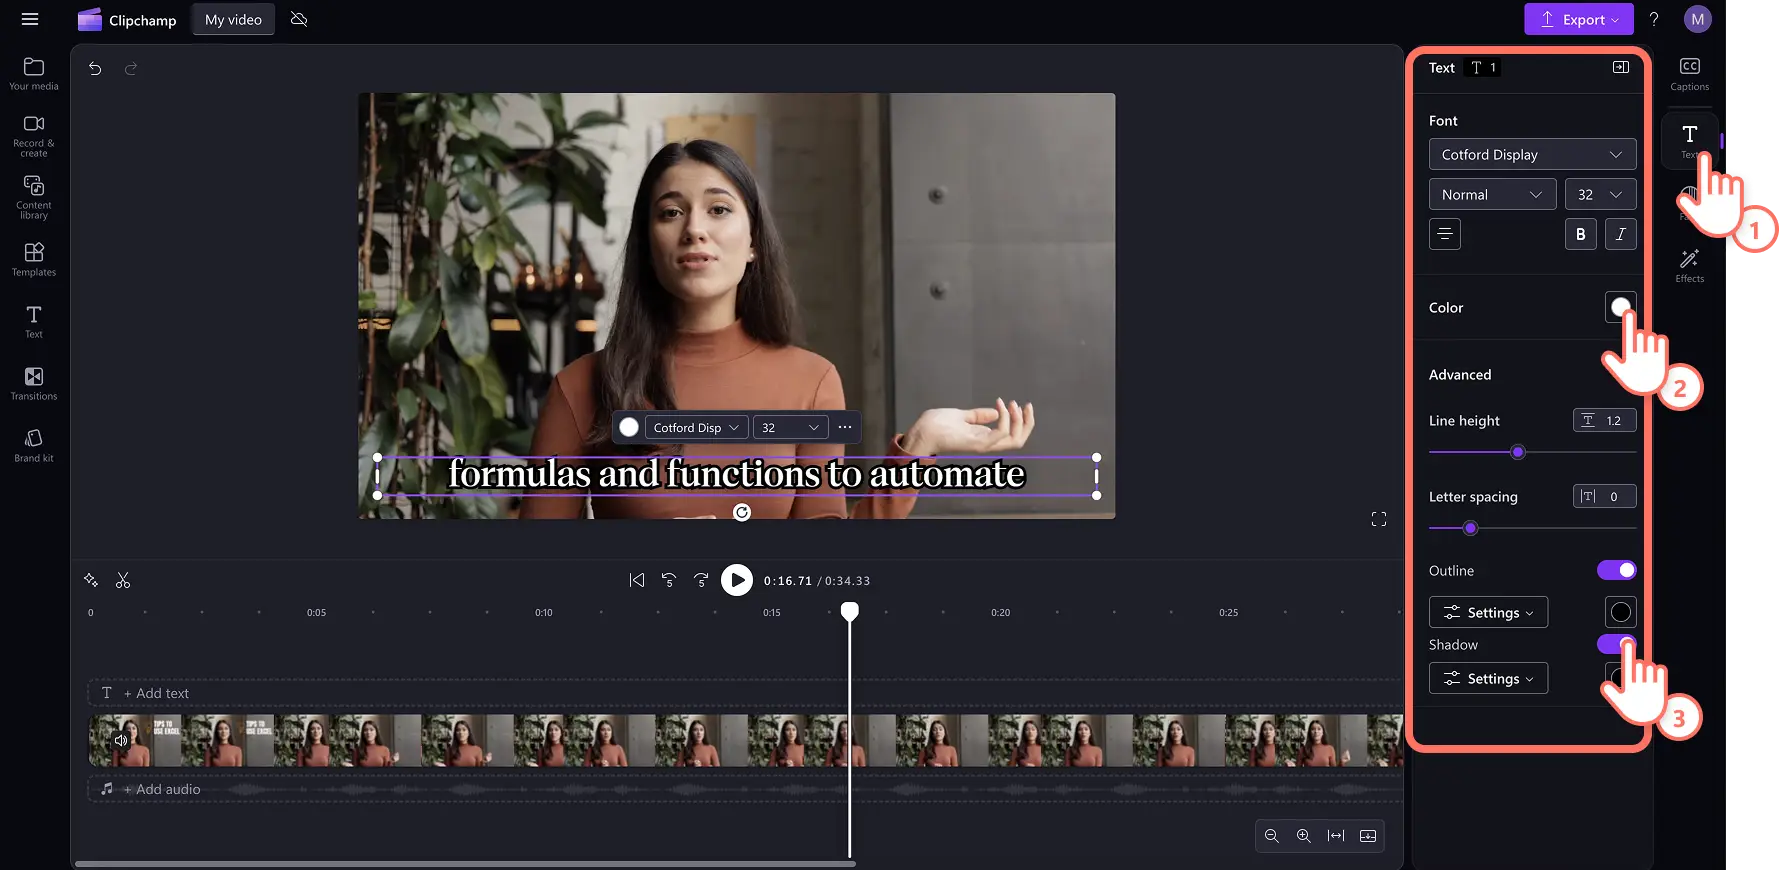
Edit the captions format and style
Select the captions text in the video preview to reveal customization options in the property panel.
Choose the text tab to select a font or use a custom branded font for a consistent look.
Change the size, alignment, and update the color palette.
Explore advanced text settings such as line height, letter spacing, outlines, and shadows to increase video accessibility in any video. Additionally, add fades and effects in the property panel for a polished finish.
How to download the SRT file from your autocaptions
SRT is a standard format for representing subtitles, also known as SubRip subtitle file format. SRT files gives the option to automatically add subtitles to a video after it’s produced. Follow these steps to download subtitles:
Click on captions tab on the property panel.
Preview and the transcript to check that there are no errors.
Select the download captions button to save the .SRT file. The video transcript will automatically download to your device.
Downloading the video's transcript is the perfect addition to any PowerPoint presentation or video slideshow to further help viewers follow the content.

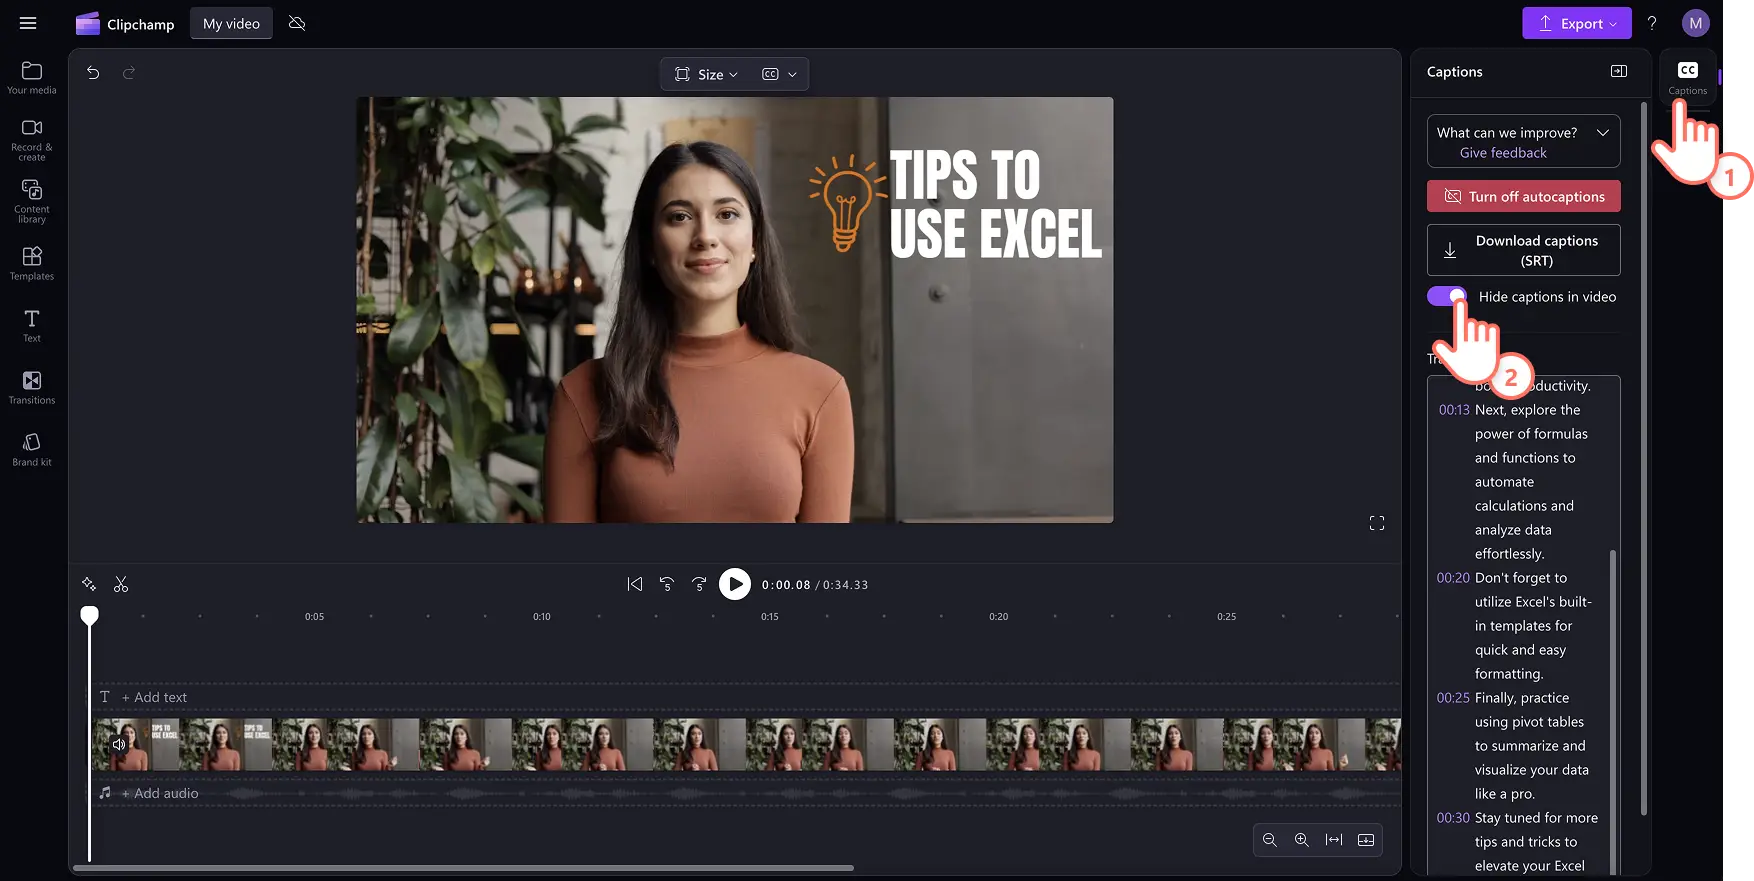
How to hide autocaptions on a video
Click on captions tab on the property panel.
Click on the toggle to hide captions in video. This will hide the captions from the video preview, but keep the transcript in the captions tab.
How to turn off autocaptions on a video
Navigate to the captions tab on the property panel.
Click on the turn off autocaptions button to remove the subtitles from the video.
Export your video in high quality without captions.

How to generate video captions in any language
Clipchamp autocaptions support transcription in a wide range of languages worldwide, including Spanish, French, Japanese, Arabic, Hindi, and more. Browse the full list of supported transcription languages to find the right match for any video.
The language selection also includes regional dialects, which add authenticity and improve caption accuracy. Spanish speakers can choose from dialects including Spanish (Spain), Spanish (Mexico), and Spanish (United States) to match the exact pronunciation and vocabulary of a specific audience. These options make a real difference for localized videos aimed at regional markets.
The autocaptions feature also works well alongside the AI text-to-speech generator, making it easy to produce a voiceover and match captions in the same editing session. This is especially useful for creating Spanish-language content for global audiences.
Learn how to make Spanish text-to-speech voiceovers with captions and see how both features work together to build fully localized videos.
Watch the autocaptions YouTube tutorial
Become an expert in creating clear and engaging subtitles for any video style such as tutorial videos, YouTube Shorts, and Reels on social media.
Frequently asked questions
Are autocaptions free for all users?
Autocaptions are free for all users, including free users and paid subscribers in Clipchamp video editor.
What languages does autocaptions support?
There are many languages available to choose from. Browse the full list of languages here. Currently, Clipchamp only supports transcription in only one language per video.
Who has access to this data?
No one has access to the data. Clipchamp uses Microsoft Automatic Speech Recognition which involves no human intervention, meaning no one will have access to the audio at any time. For more help with autocaptions, refer to this help article.
Does Clipchamp store any caption data?
Captioning data is stored alongside the Clipchamp video and can only be accessed by the account owner. The audio is processed entirely by Microsoft Automatic Speech Recognition with no human access at any point, and caption data is not stored separately from the video or used for any other purpose.
If I don't want Clipchamp to process this data, can I prevent it?
To prevent the Clipchamp video editor from processing any audio data, turn off the autocaptions feature in the captions tab on the property panel. Keep in mind that turning off autocaptions removes the subtitle transcript from the video entirely.
Explore more ways to upgrade video accessibility with ASL sticker overlays, or learn how to transcribe audio to text in everyday Microsoft tools.
Start editing today with the Clipchamp video editor or download the Microsoft Clipchamp Windows app.
Heads up! The screenshots in this article are from Clipchamp for personal accounts. The same principles apply to Clipchamp for work and school accounts.